Convert OLM to PST file format with free solution

Summary: This article states free ways to convert OLM file to PST format that will help you to export all emails, contacts, notes, calendars, tasks, etc. from Mac Outlook OLM file to Windows Outlook PST file without any fear of data loss.
If you are using Outlook application in Mac system and want to export all emails and other items to OLM for local backup. When need to import data from OLM file to Windows Outlook, this can’t be directly possible as Outlook in Windows does not support OLM file. It supports PST file hence the need to convert OLM to PST arises.
Common reasons responsible for OLM to PST Conversion
It is pretty clear that Windows Outlook can’t access OLM file, it needs data in PST file format. Let us know some of the common reasons and scenarios where OLM to PST conversion is required –
- Unavailability of Mac environment or working on Window environment for temporary basis
- The firm is shifting permanently to Windows Outlook.
- Found OLM files and need to access its data in Windows Outlook
- Need to use Windows environment for temporary basis
Having aware of the need of OLM to PST conversion, now move towards the process of conversion which can either be manual or automated solution.
Freely export Outlook for Mac OLM to PST file
The free method for exporting OLM data to PST file has five steps.
Setting IMAP Server account via Gmail
Follow these steps to set IMAP account in Gmail –
- Open your Gmail account with correct username and password.
- Go to Settings and choose Forwarding & POP/IMAP.
- Go to IMAP access option and enable IMAP option
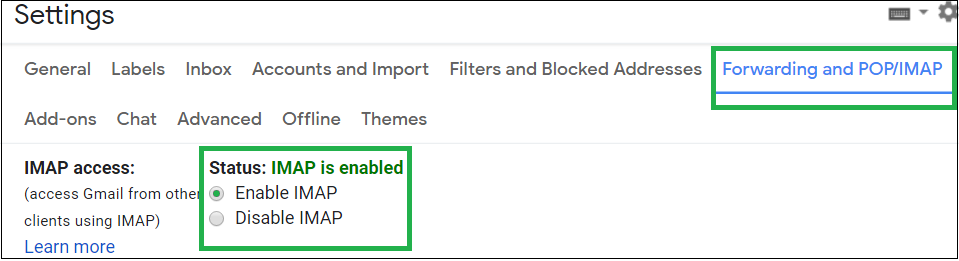
- New IMAP account is created
Configuring IMAP account with Mac Outlook
After creation of IMAP account, add this account on Mac Outlook. Use these steps –
- Launch Mac Outlook application and go to Tools & select Accounts
- Click on E-mail account option once the account window is opened.
- Add same Gmail account with username and password. Click on Add account.
- IMAP Mail account is added and can be displayed on Mail tab.
Creating label in Gmail account
Now, create label in your Gmail account. Here are the steps for this –
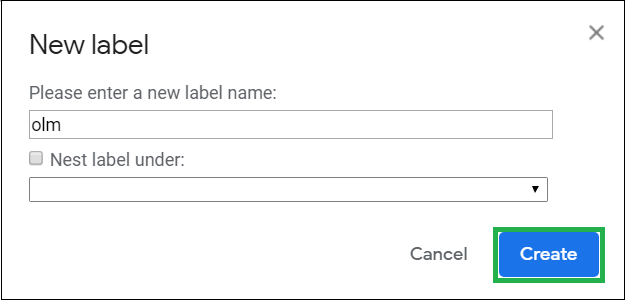
- Open your Gmail account. Go to Settings. Now, go to labels tab and click on create new label option.
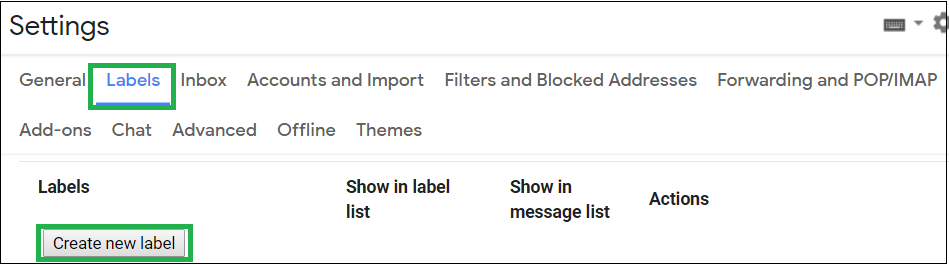
- Provide name to the label and click on Create.
- Make sure to mark show in IMAP option.

- Now, go to Mac Outlook and click on Send/Receive option for updating IMAP mailboxes.
Moving OLM emails to IMAP Server
Now, move desired OLM emails into IMAP mailbox on Mac Outlook with the below-discussed steps –
- Select desired mailbox folder items through OLM mailbox and select Move > Copy to Folder.
- Provide name of desired IMAP folder and click on Copy option. For multiple files transfer, repeat the steps.
- Click Send/Receive to update.
- Now, all OLM emails are transferred to IMAP Server account.
Configure IMAP account in Windows Outlook
Now, configure this IMAP account with OLM data on Windows Outlook. Follow the steps for this –
- Go to Control Panel, select Mail, Email account and then click on New.
- In account page, select manually configure server settings option and click Next.
- Select IMAP/POP settings and click Next.
- Enter account credentials, server details and click on More settings option.
- On advanced tab, add port number 993 for IMAP Server settings and port number 465 for SMTP Server Settings. Choose SSL connection and save settings. Finally, click on Finish.
- Now, move OLM emails from configured IMAP folder to your PST mailbox Inbox folder by drag & drop or copy-paste.
As you can clearly see that the process is divided into 5 stages thus huge time is consumed and chances of errors are more during the entire process. Also, few emails can be transferred at a time with this method. For huge data transfer, more time and efforts are needed. Need of different environment (Windows and Mac) is required to implement the process. Thus, it is concluded that the manual solution is full of obstacles so it is better to leave it and look for alternate solution.
A direct solution for OLM to PST Conversion
Softaken Software has provided a smart solution for conversion of OLM files to PST file format. OLM to PST Converter is a direct and safe tool for the conversion of Mac Outlook OLM emails, contacts, calendars, notes, etc. to Windows Outlook PST file format. Not only PST, but other file formats are also supported by the software to save OLM files. It is considered one of the easiest and best ways to access Mac Outlook OLM data to Windows Outlook PST file. The software has no compatibility issues and offers instant conversion results in a few minutes without any hassles.
Step by step process of OLM file to PST file conversion –
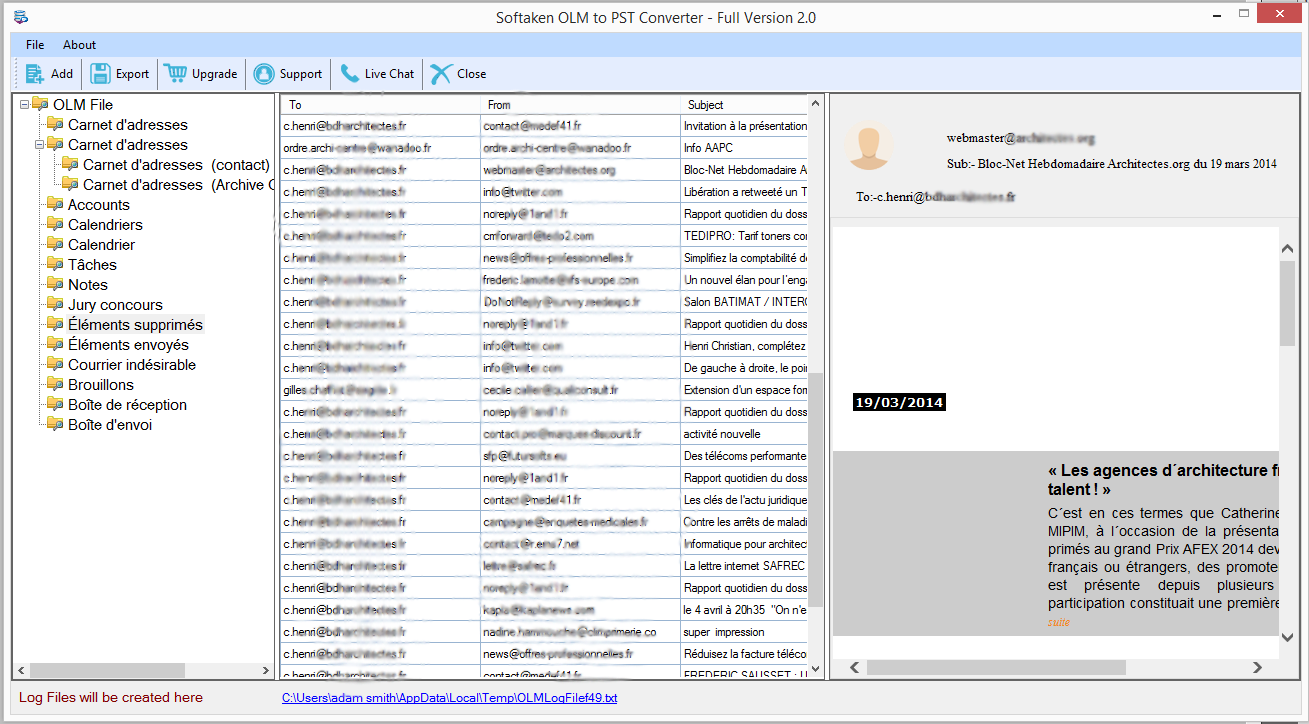
- Launch OLM to PST Converter Program on any Windows system.
- Hit the Browse option and load Mac Outlook exported OLM file.
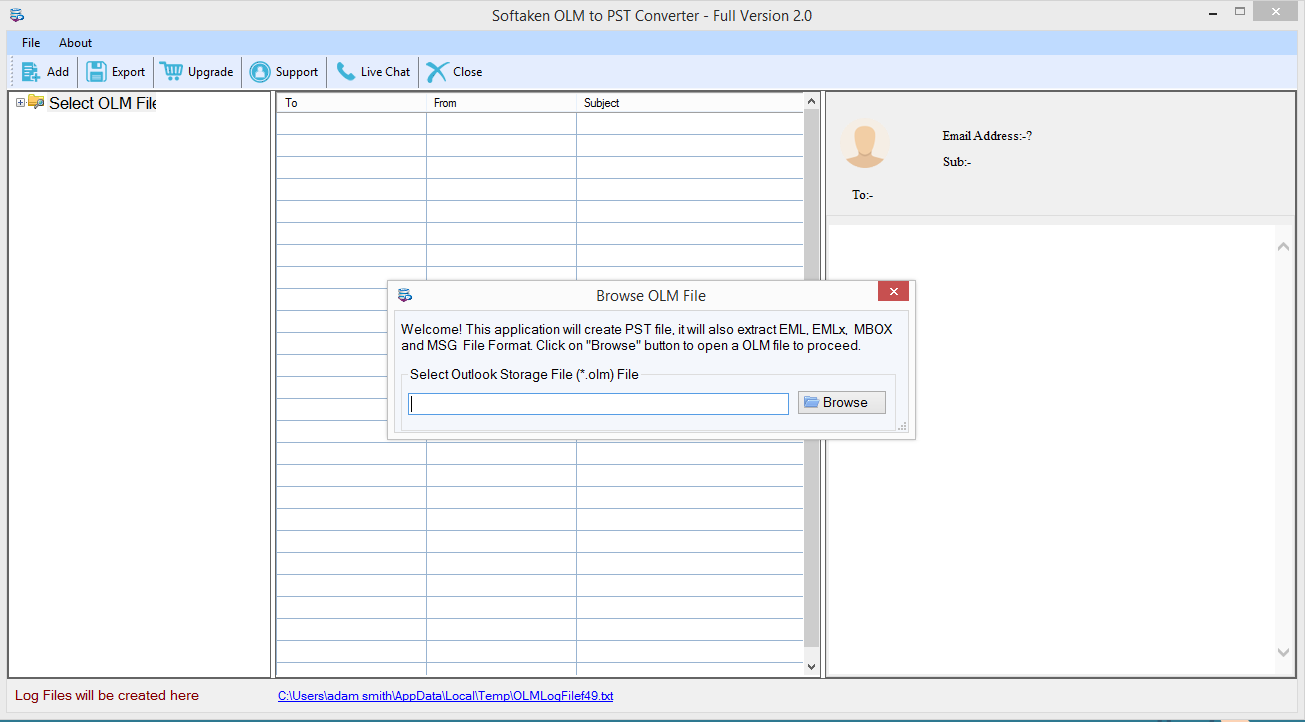
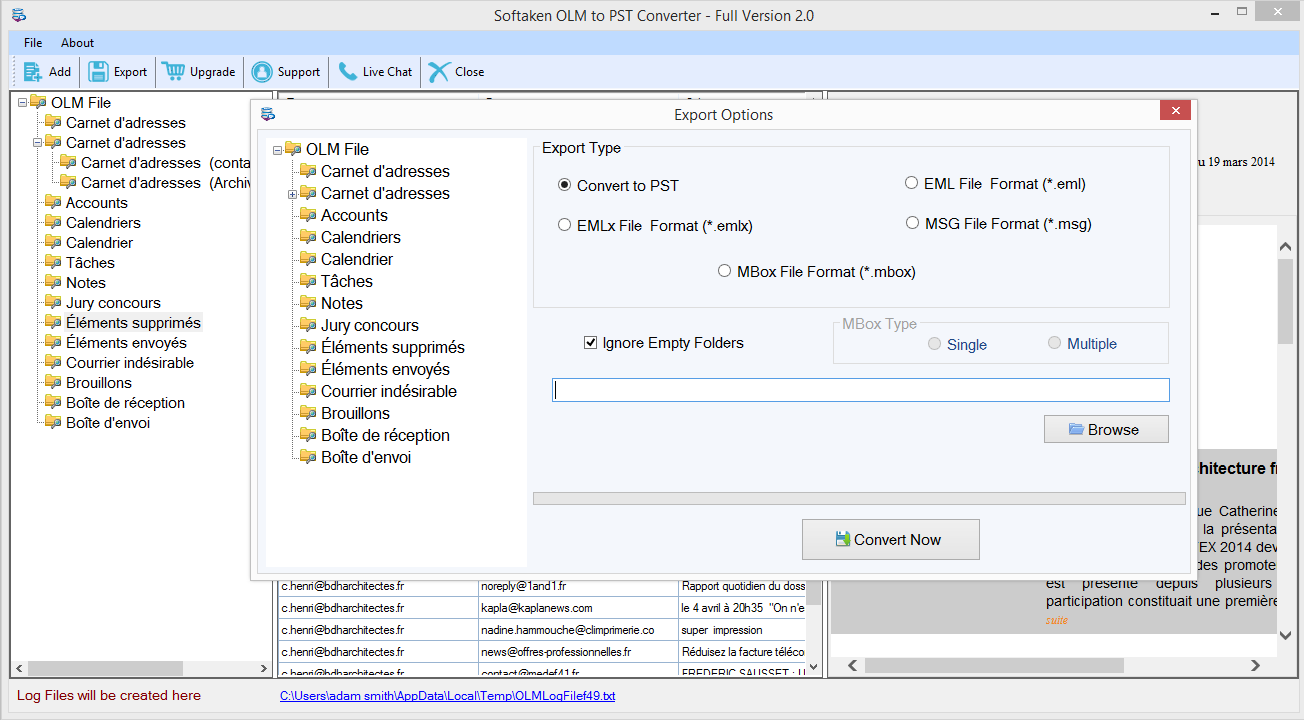
- Check preview of OLM file items and hit Export button.
- Select Convert to PST under Export options
- Use the Browse button and provide location to save PST file.
- Finally, hit the Convert Now button.
In a few minutes, OLM data is exported into PST file format that can be easily opened in all editions of Windows Outlook application.
The Bottom Line
In this write-up, we have discussed a free solution to convert OLM file to PST file bit it has few limitations that’s why we provided an alternate solution i.e. OLM to PST Converter professional software. You can check out both the methods and pick one as per your suitability. We highly recommend professional solution as it is simple and quick to use without any issues. Understand the software free of cost with free trial version & then get the license keys.