Professional Guidance for Office 365 cum Exchange Migration
Most of the techies must have used Office 365 for both professional and personal uses. For those who do not know Office 365, it is cloud-based Software as a Service (SAAS). This software offers multiple user-oriented features and different kinds of services. It has come as the best migration tool because of its user-friendly and simple features.
The benefits of Office 365
Now that you have understood what Office 365 stands for, let us discuss some of the benefits of this software that make it the best among all others.
- Easy accessibility
- Features user-friendly services including Hosted Exchange Server, Collaboration, and much more
- Office 365 is all-time updated software; hence a user need-not update the software after intervals
- Office 365 is a trusted Microsoft product. There are no security concerns attached to Office 365 as it is among the most secured software ever produced
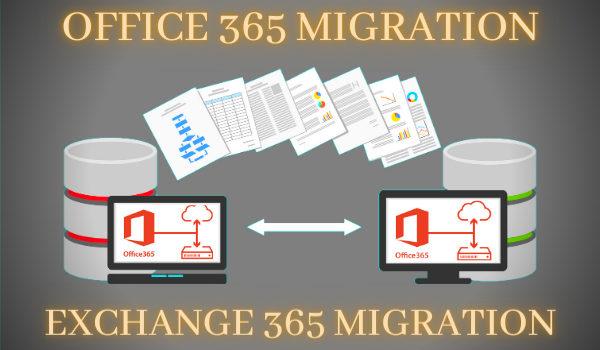
A Guide on How to Migrate Exchange to Office 365
There are various methods to migrate Exchange to Office 365. Users can also use various manual methods like Hybrid Migration, Staged Migration, etc. However, all these manual methods of migration have certain disadvantages attached to them. These methods only allow a very limited number of mailboxes to migrate. Apart from that, these methods are not compatible with all versions of the Exchange server. Just because of these limitations, we always recommend users to use a professional Office 365 migration tool.
A Professional Office 365 Migration Tool:
Nowadays, everyone needs a smart solution to their problems. The solution must be hassle-free and should always provide a seamless experience of tackling every kind of problem.
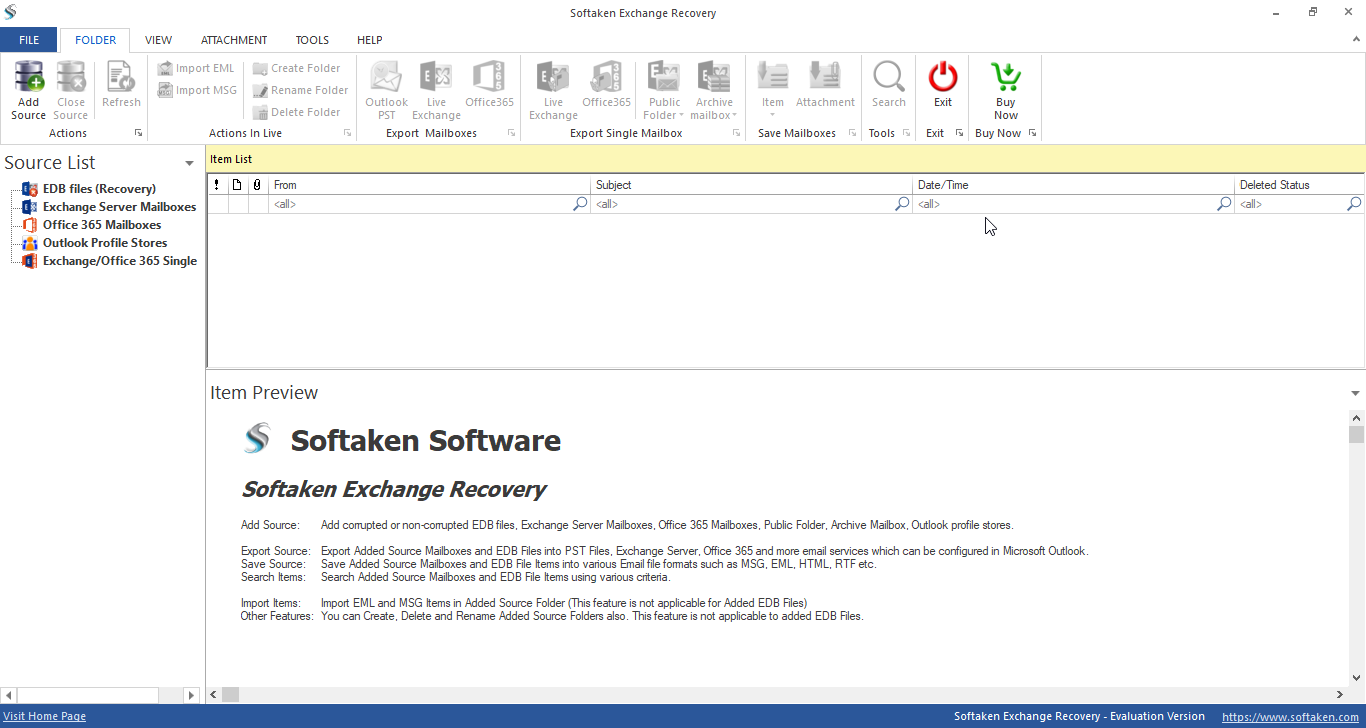
Similarly, Softaken’s Exchange Server Migration is a multi-featured tool that is enabled with different kinds of features and specifications that are capable enough to fulfill the market’s needs and demands.
Softaken’s Exchange Server includes the following features:
- Allows users to add Office 365 Mailboxes, Exchange Server Mailboxes, Exchange Server Single Store, and Healthy PST file as a Source.
- Using this server, you can easily add and export the Office 365 mailboxes at once into Outlook PST files and Live Exchange Mailboxes.
- The software features an e-Discovery (Search) feature that helps users to search for different items based on their name, source, sender name, etc.
- Softaken Exchange Server Migration allows users to recover corrupted exchange mailboxes or EDB files.
- This software is enabled with the Mailbox Mapping option and Preview button.
Office 365 Migration Guide for Exchange to Office 365 Migration:
Softaken’s Exchange Server Migration has all those features that allow the user to do various tasks that are related to Office 365, Outlook PST, live exchange, and much more. All users need to do is follow some easy steps to migrate and execute tasks that they have planned. As mentioned above, it is user-friendly software, hence comes with very easy steps that can be executed by everyone.
Simple steps to migrate Exchange to Office 365:
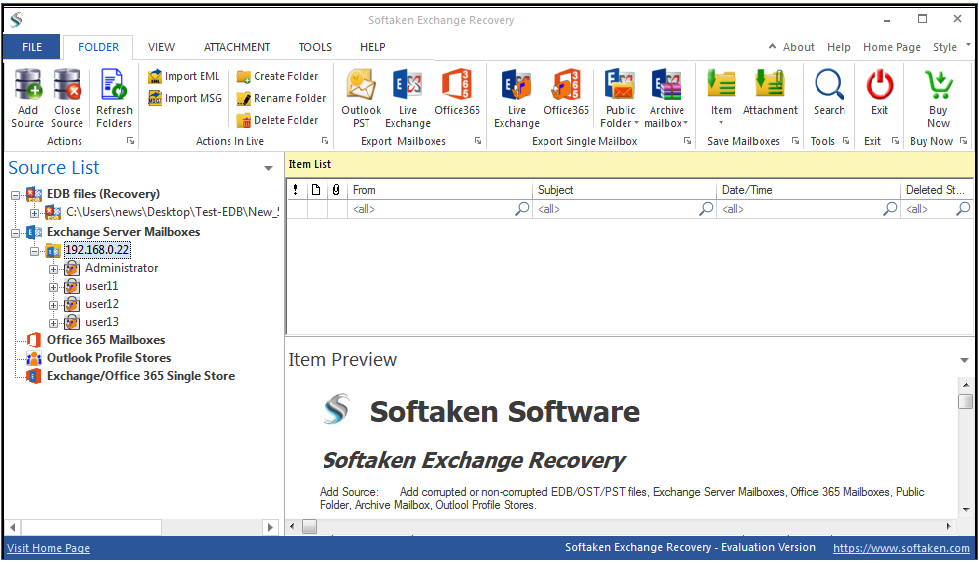
Step 1: First, install the Softaken software and launch it on your screens.
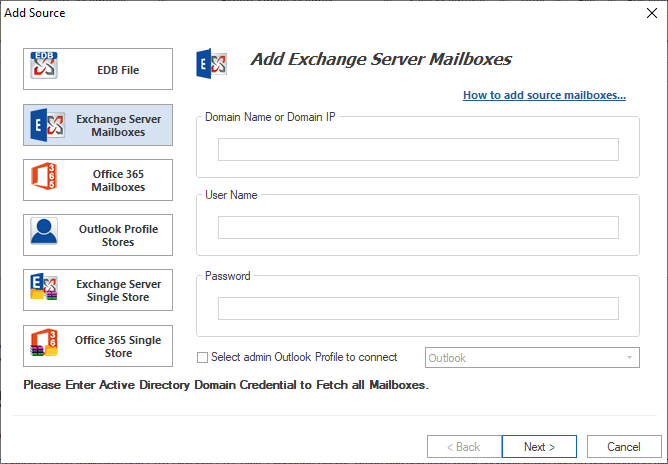
Step 2: Now click on the ‘Add Source’ button of the Ribbon bar.
Step 3: Add “Exchange Server Mailboxes” as a source. Now enter all the credentials like the Domain name, password, etc., and click on the ‘Next’ button thereafter.
Step 4: Now you will be taken to the mailbox section page. Select the mailboxes from the list. There are chances when you might not find the desired mailbox in the list. In that case, you may add mailboxes by entering the user’s email id and then select an export list to add the mailbox. Once done, click on the ‘Finish’ tab.
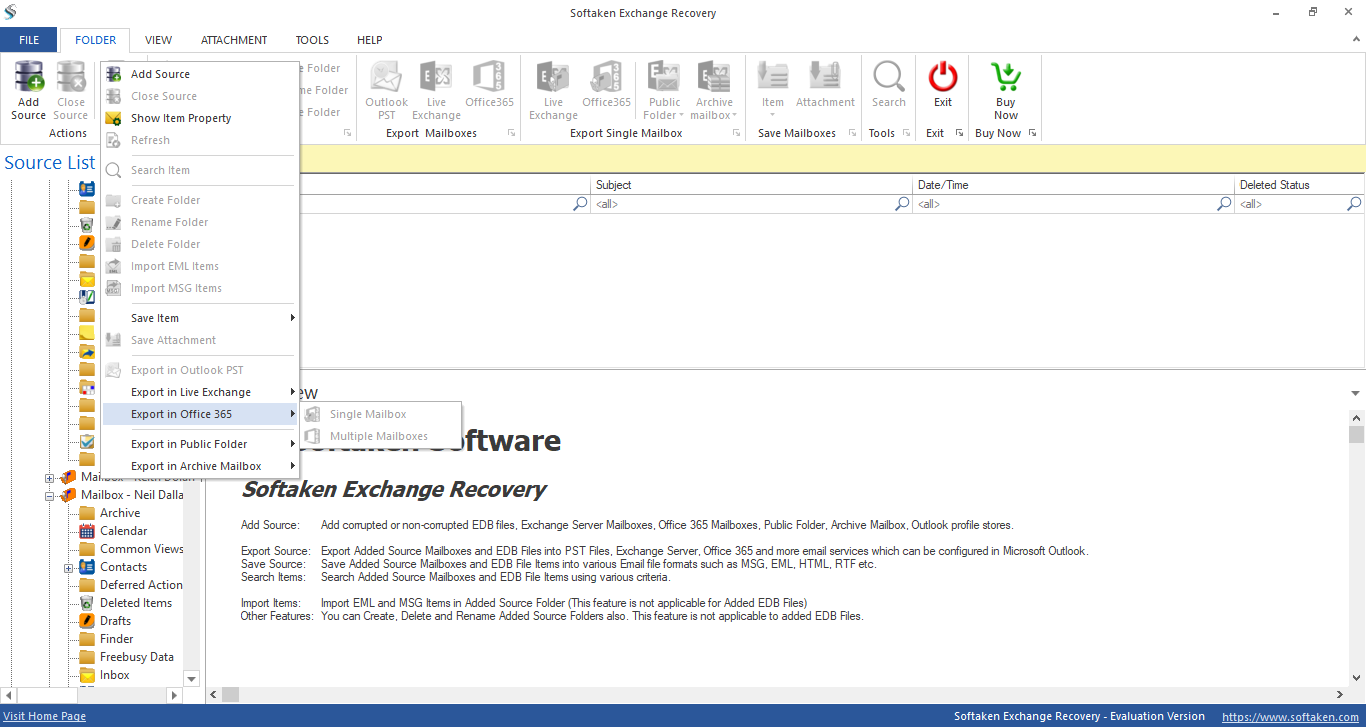
Step 5: Now you can see the content by selecting the mailboxes from the source list.
Step 6: Open the source list and click on the mailbox. Now select the option Export Multiple Mailboxes into>>Office 365 Mailboxes.
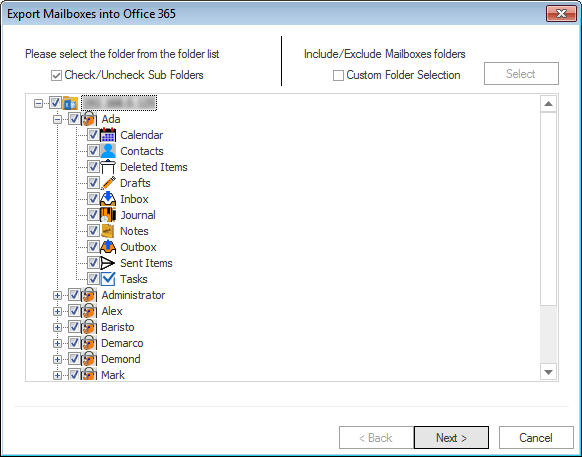
Step 7: Now will see the option of Check/Uncheck in your screens. Make sure you check the subfolders from the list. Now click on ‘Next’ to move further.
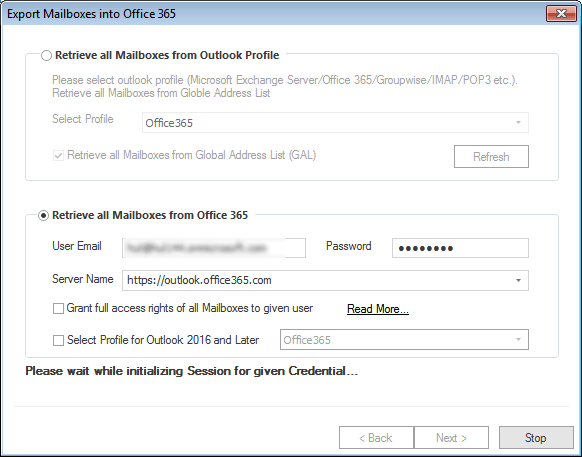
Step 8: Now you will get a hold of options to retrieve mailboxes from the target. You will see one such that uses Outlook Profile and another that uses Office 365 credential. Select the ‘retrieve all mailboxes from Office 365’ tab and enter the user email, password, and grant complete access rights of the mailboxes to a user. Click on the ‘Next’ button and wait for the mailboxes.
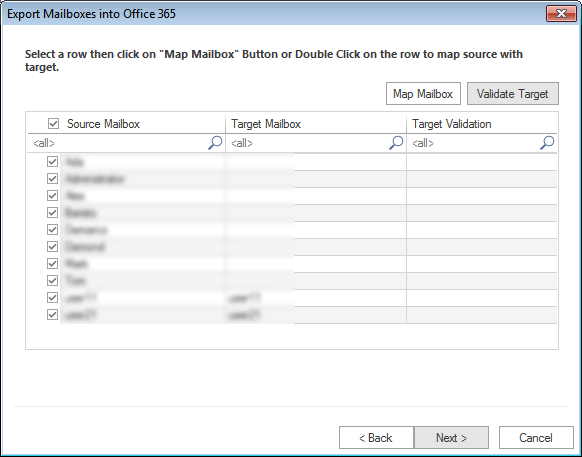
Step 9: Once done, you will then see options to Map Mailbox and Validate Target. Using the Map Mailbox option, you can easily map the source mailbox with the target mailbox. Once done, click on the ‘Next’ button to proceed further.
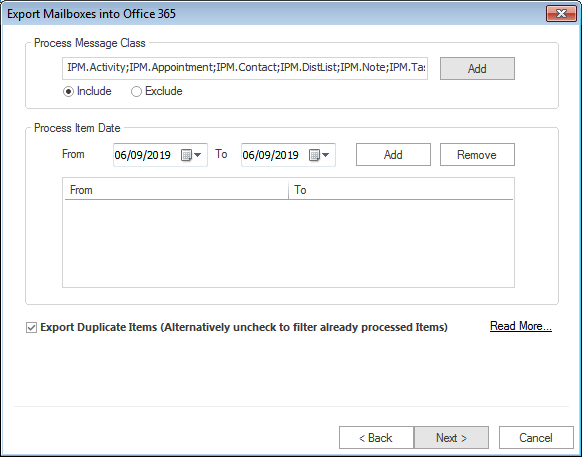
Step 10: Once you have followed all these steps, you will reach the filter page. On this page, you can apply the filter based on the Process Message Class and Process Message Date. Now on click on the Next button.
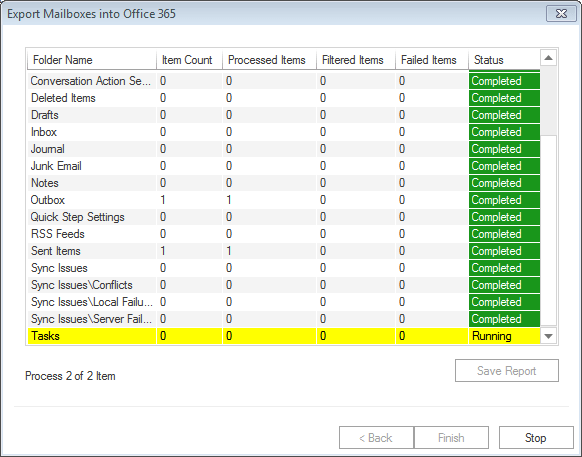
Step 11: This is the last step of the whole process. Once you have completed all the steps, you will see a message, i.e. “Process completed successfully”. Now you may also save the report by clicking on the Save Report tab. Click the ‘Finish’ tab once you have done everything.
Conclusion:
There are so many benefits of using Office 365 as it facilities an easy migration process. You may migrate your mailboxes to various servers using manual methods like cutover Migration, Hybrid Migration, etc., but these manual methods do not offer a smooth flow of the services. Hence, in this case, a professional migration tool or an Exchange server tool is the best thing. Softaken Exchange Migration has revolutionized the way of migrating mailboxes to different servers.