Import OST to Office 365 Account – Simplified Solution
Moving your Exchange mailbox data to Office 365 cloud environment has many advantages. Emails in Office 365 are accessible everywhere when you have the internet connectivity. Many Exchange users believe in keeping a copy of Exchange mailboxes on Office 365. To perform this migration, one can export their offline Outlook data file (OST) to Office 365 account. This can be done in many ways.
Instant Solution
If you want a quick solution to import OST emails to Office 365, try Softaken OST to Office 365 Migration Tool.
Before this, let us know the causes to move OST files to Office 365 cloud.
Reasons to import OST to Office 365
- Organizational shift owing to Office 365
- Exchange crash and want a reliable platform
- Quick data access in safe environment
How to import OST emails to Office 365?
There are no direct solutions available to migrate OST emails to Office 365. You can convert OST files to PST format and then import the files to Office 365 account. Also, using third-party tools, you can directly perform the migration.
- Convert OST file to PST format and then import to Office 365
- Import OST file to Office 365 directly using third-party tools
Method 1. Import to Office 365 after converting OST file to PST
This method is an indirect method to migrate OST emails to Office 365. For this, convert OST to PST first and then upload them to Office 365 cloud.
Step 1. Convert OST file to PST format
There are several ways to convert OST file to PST file format –
- Create a new PST and copy OST items in it.
- Using MS Outlook archive feature.
- Using Export feature of MS Outlook.
- Using third-party OST to PST Converter.
Create a new PST file and copy items of OST file
The method helps to transfer OST mailbox items to new PST file format.
- Start Outlook application.
- Create a new PST file in Outlook.
- Copy data from the required mailbox folder and paste it into PST file.
Use archive feature of MS Outlook
- Start Outlook application and select File Cleanup tools archive.
- Select a file or folder.
- Browse the destination where you want to save the file and click Ok.
- Entire mailbox items are archived.
Use Export feature of MS Outlook
- Start MS Outlook and go to Export option from File tab.
- Select 'Export to a file' option and click Next.
- Select Personal File Folder and click Next.
- Choose the folders whom you want to export.
- Provide a destination path for the exported file. Click Finish.
Step 2. Migrate PST file to Office 365 cloud
After performing the conversion of OST file to PST format, you can upload the resultant file to Office 365 in various ways –
- Upload to Office 365 using Azure AzCopy
- Drive shipping to Microsoft
- Use third-party OST to Office 365 Migration Tool
Using Azure AzCopy
One can directly upload PST file to Office 365 using Azcopy.
- Download and Install Azure AzCopy and copy the SAS (Shared Access Signature) URL (the SAS URL will provide the necessary permission to export PST file to Azure).
- Upload PST file to Office 365
- Create PST mapping (CSV) file
- Create an import job in Office 365 to import PST file
- Filter the data and initiate the PST import job
Drive Shipping PST file to Office 365
Drive shipping to Microsoft helps to import PST file to Office 365 cloud environment. For this, copy the PST file to hard disk drive and send the drive to Microsoft. Microsoft will copy the data from the disk drive to the cloud.
Method 2. Import OST files directly to Office 365 using third-party tools
Import OST files to Office 365 is not so easy. Both novice and non-technical users find it difficult task. But with third-party tools, the migration can be easily carried out. Softaken Import OST to Office 365 is one such powerful tool for this.
How to import OST to Office 365 easily?
Softaken OST to Office 365 Migration Tool directly upload multiple OST files to Office 365 account. Know the complete procedure to perform this migration –
- Download, install and launch the software successfully on your Windows system.
-
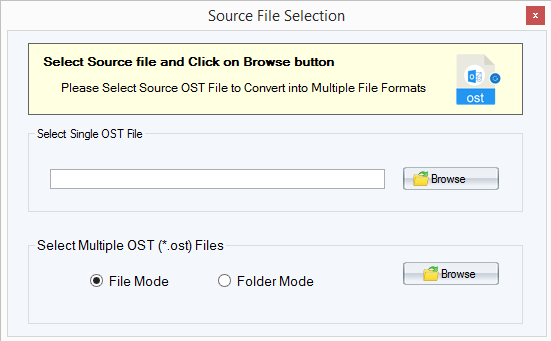
Select File or Folder mode and Browse OST file to the software panel.
-
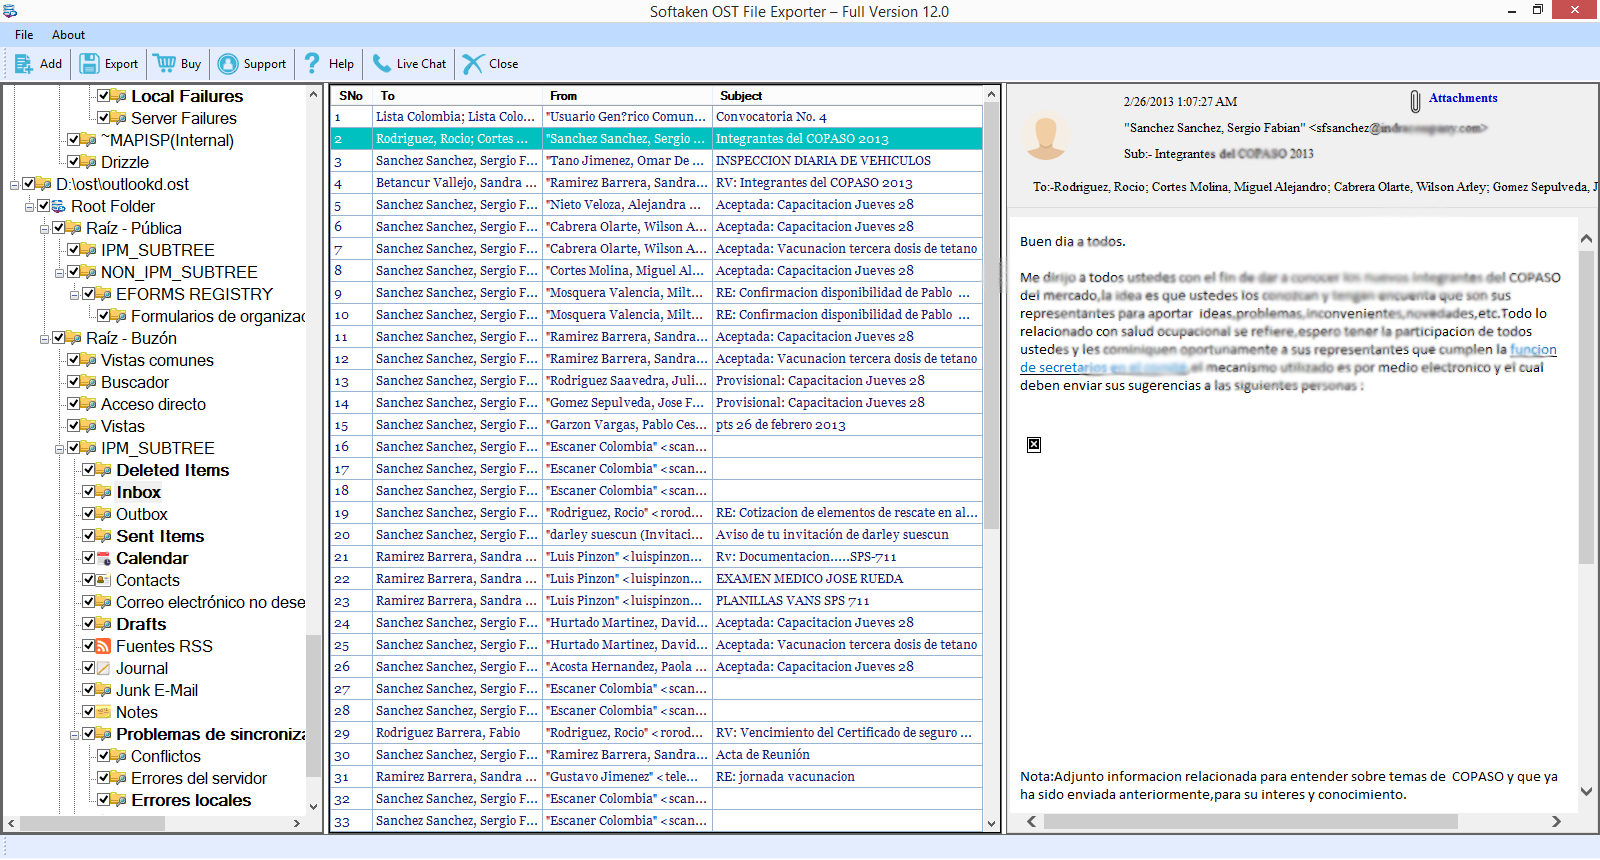
The added OST file is displayed on the software panel.
-
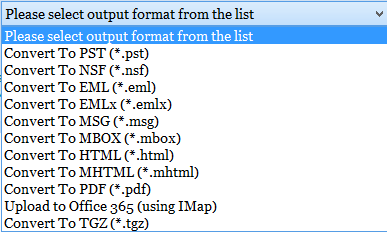
Under Export options, choose upload to Office 365 account.
- Provide Office 365 account username and password. Also, choose folder to import OST file.
Conclusion
Softaken OST to Office 365 Migration Tool offers a simple way to import OST emails to Office 365 account. The software is useful for both technical and non-technical users. No matter, various solutions are there to complete the migration but professionals recommend third-party tools for safe, direct and easy migration of OST files to Office 365 account.